
商品详情
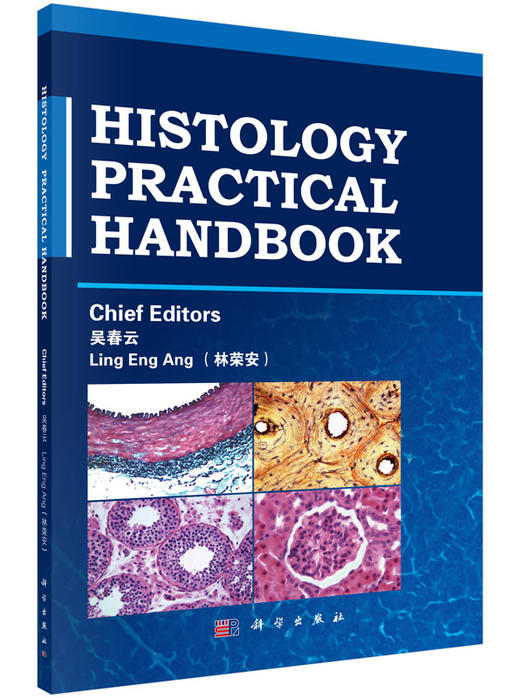
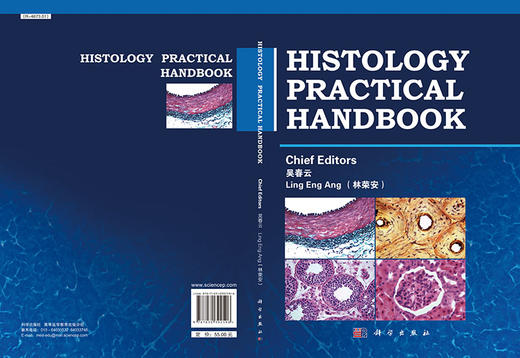
书名:组织胚胎学实验手册(英文版)
定价:55.0
ISBN:9787030392596
作者:吴春云,Ling Eng Ang
版次:1
出版时间:2014-01
内容提要:
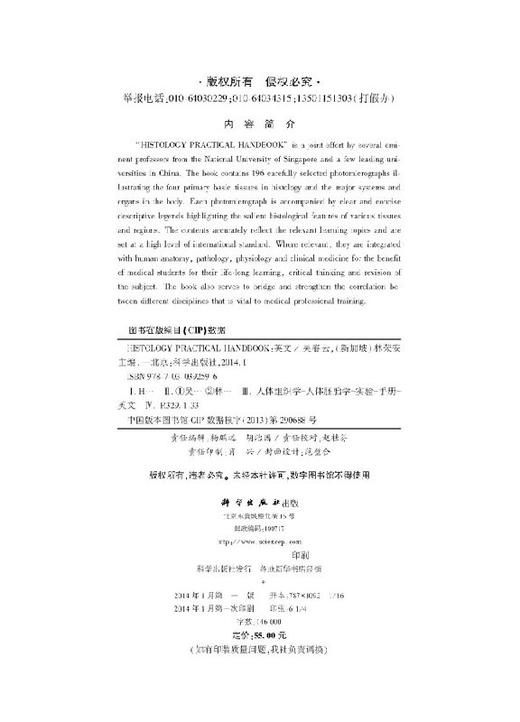
“HISTOLOGY PRACTICAL HANDBOOK” is a joint effort by several eminent professors from the National University of Singapore and a few leading universities in China. The book contains 196 carefully selected photomicrographs illustrating the four primary basic tissues in histology and the major systems and organs in the body. Each photomicrograph is accompanied by clear and concise descriptive legends highlighting the salient histological features of various tissues and regions. The contents accurately reflect the relevant learning topics and are set at a high level of international standard. Where relevant, they are integrated with human anatomy, pathology, physiology and clinical medicine for the benefit of medical students for their life-long learning, critical thinking and revision of the subject.
媒体评论:
目录:
Contents Chapter 1 Introduction to Histology Practical Classes and Use of a Light Microscope (1) Chapter 2 Epithelial Tissue (6) Chapter 3 Connective Tissue Proper (11) Chapter 4 Cartilage and Bone (15) Chapter 5 Blood (20) Chapter 6 Muscle Tissue (24) Chapter 7 Nervous Tissue (28) Chapter 8 Integument (37) Chapter 9 Cardiovascular System (40) Chapter 10 Immune System (46) Chapter 11 Eye (51) Chapter 12 Digestive Tract (56) Chapter 13 Digestive Glands (65) Chapter 14 Respiratory System (71) Chapter 15 Urinary System (75) Chapter 16 Endocrine System (79) Chapter 17 Male Reproductive System (84) Chapter 18 Female Reproductive System (89) Table of Slides (96)
在线试读:
Chapter l Introduction to Histology Practical Classes and Use of a Light Microscope Histology is the study of normal microscopic structure of the human or animal body through the light and electron microscopy. In this connection, the practical class is deemed tobe the best mode of study to complement as well as enhance the learning of the subject and tobetter understand and appreciate the functions of the human body at the cellular and tissuelevels. Through the microscope, students can on their own better observe and study the mor-phology of cells, tissues and organs in the laboratory. Indeed, the hands-on practical class isthe most efficient way for training of students in their ability for life-long and independentlearning, analytical and creative thinking. It is therefore essential for all students to be fullyequipped and be competent with the usage of this investigative tool or mode of study. [Objectives] 1. To use the light microscope correctly. 2. To describe the structure of cells accurately. 3. To know step-by-step the procedure for preparing the paraffin embedded tissuesections and haematoxylin and eosin ( H&E) staining routinely used for the practical class.[ Component parts of a light microscope and its usage] The optical microscope is widely used in different disciplines of science. It plays a vitalrole for exploration and investigation of tissue organization both in teaching and research. Asthe microscope is an expensive instrument that demands careful and precise manipulation, anyimproper usage or poor maintenance may cause damage to the instrument resulting in undesira-ble outcomes. All students are therefore expected to familiarize yourselves first with the differ-ent parts of the microscope and their properties before you intend to examine the microscopicslides independently. A standard optical microscope normally consists of two major parts: mechanical compo-nent and optical component. The mechanical component includes the stand and arm, oculartube, nosepiece, specimen stage, specimen holder, focusing device ( coarse focus knob andfine focus knob) etc. The optical component includes the eyepiece, the objective lens, con-clenser, illuminator etc ( Figure l-1) . (1) Setting up the microscope: The microscope is an optical instrument with great preci-sion and therefore it should be carefully protected and properly maintained. The placement ofthe microscope is of utmost important as it should be suitable and comfortable for your ownpersonal observation of slides. For safety reason, it must be kept from the edge of the table at a distance no less than 6 cm. (2) Viewing: When viewing a slide with the objective lens, you should always beginwith the low-power lens before switching it over to a higher-power lens to avoid damage to theslide or lenses. A. Use of a low-power objective lens Turn on the power. Adjust the light path by turning the objective lens to make sure thatthis maneuver passes through the multiple low-power objective lenses in an ascending orderfrom the lowest power lens. Meanwhile, you should hear a "ka" sound when the objectivelens is switched from one to another. Open the diaphragm, raise the condenser and with yourtwo eyes open, adjust the distance between the two oculars. Next, use the illuminative controlto allow the optimal lighting. Place a slide on the specimen stage and stabilize it using thespecimen holder. Ensure that the tissue section is on the upper side of the slide. Move thespecimen into the center of the light path with the thruster and focus on it. Turn the coarse fo-cusing knob to move the stage up to the highest level; then turn the knob slowly to lower thestage. When the image is in the view, turn the fine focusing knob to ensure that it is better fo-cused. B. Use of a high-power objective lens Before using the high-power objective lens, you must first find a sharp image under thelow-power objective lens. Once you have a selected sharp image under the low-power lens,move the target to the center of the field and focus it. Turn the high-power objective lens verycarefully so as not to damage the specimen. Examine the specimen through the ocular by ad-justing the fine focusing knob only. N. B. You should never use the coarse focusing knob under the high power objectivelens. (3) Replacing the glass slides: When you have completed viewing a slide, and wouldlike to move on to the next, you must first move the stage down under the low-power objectivelens. After this, remove the slide from the pinchcock in order to avoid damaging to the slideand the objectives. (4) At the end of the class session, do remember to remove the slide from the micro-scope , turn off the power, return your microscope to its appropriate place, and put on the dustcover. 3 . Additional notes or tips for use of a class microscope (1) The microscope and the slides must be carefully and properly kept and maintained;the cover slip on a slide placed on the microscope stage should always be face up; changing ofslides must be carried out under the low-power objective lens. When using the high-power ob-jective lens, do ensure a safe distance between the objective lens and the slide. (2) Under no circumstances the lenses are removed from the light microscope. Any loos-en or damaged parts should be reported to the teacher-in-charge immediately. ( 3 ) Keep the microscope clean, and any dirt found on it must be wiped off immediately.If the lenses are dirty, clean them gently with a lens paper. Do not use your hands or a hand-kerchief, or else they may damage the lenses. (4) Do remember that you are sharing your slide box with other students. After viewingthe slides, do make sure to return them to their proper slots. Be considerate. (5) Before each laboratory class, check the light microscope and the slides. If you no-tice any damage to the microscope or missing slides, you should report this to the staff-in-charge.[ Procedure for preparation of paraffin embedded tissue sections and H&E staining] The first step in examination of tissues and organs under a light microscope in the labora-tory class is preparation of histology slides. The most commonly used method for this purposeis preparation of tissue sections derived from formalin-fixed tissues which are paraffin-embed-ded. Tissue sections are first prepared from this and then stained with haematoxylin and eosin( H&E) to differentiate the different components of cells and tissues. The purpose of fixation is to prevent the fresh tissue from undergoing autolysis ordigestion by bacteria. Fixation preserves the integrity of tissue structure and molecular compo-sition. Some chemical or mixture of chemicals is used as fixatives. Formalin is widely used asa fixative of choice for the preparation of the histology sections. Tissues are usually immersedin solutions of fixatives immediately after they are removed from the body. Before the fixation,the specimen must be cut into the small pieces so as to allow the fixative to penetrate fully intothe tissue. Sometimes, the animals such as rats and from which the tissues are derived are perfused by intravascular perfusion. In this case, the fixative can reach the tissue rapidlythrough the blood vessels ( arteries). The purpose of embedding is for obtaining thin tissue sections so that the light can pass through the tissue for optical and optimal visualization under the microscope. The paraffin em-bedding is used routinely for light microscopy. Before embedding, tissue should bedehydr ated with ascending concentrations of alcohol. After this, tissue will be cleared in xy-lene and impregnated in melted paraffin in the oven which allows the paraffin to diffuse intothe tissue spaces. The tissue together with the impregnated paraffin is then solidified outside the oven at room temperature. The hardened blocks containing the tissue are now ready forsectioning on a microtome. Tissue sections are normally cut with a microtome at a thicknessranging from l t0 10 ym. The sections are floated on water surface and transferred to glassslides to be stained. To differentiate and better appreciate the different components of tissues and cells, it isnecessary to "color" them. Before the staining, paraffin must be dissolved or cleared with xy-lene. The combination of haematoxylin and eosin ( H&E) is the most commonly used staining method. Tissue components that pick up the basic dye are described to be basophilic, while those with an affinity for acid dyes are regarded to be acidophilic. N. B. Do note that some artifacts such as shrinkage, wrinkles, and precipitates of stainmay be present in the slides. These artifacts are linked to the methodology, equipment or rea-gents used during the preparation process. Students must be aware of the existence of artifactsand appreciate that not every slide in their slide-box collection is always perfect.[ Observation of tissue sections] Low power: Many nerve cells ( neurons) , nerve fibers and glial cells can be seen in the section ( Figure l-2) . High power: The dorsal root ganglion cells or sensory neurons are classified as pseudo-unipolar neurons. The cell body or soma of the neurons is generally round or elliptical. The outline of the neurons is well delineated but the cell membrane (plasma membrane) is not well defined under the microscope. Some bluish granules named Nissl bodies are randomly distributed in the cytoplasm. The nucleus which is often centrally located and bearinga conspicuous nucleolus is lightly stained.The satellite cells, a form of glial cells,surround the neuronal cell body or soma( Figure l-3 ). They provide nutrientsupport to the neurons. A section through the dorsal root gan-glion stained with silver nitrate. Thismethod facilitates the staining of the Golgicomplex of the neurons. The Golgi complexwhich is stained brown is located in the cy-Black arrow: Neuron; White arrow: Glia cells ( satellitetoplasm near the nucleus. Note the nucleus cells)is lightly stained ( Figure l-4). Questions: Why do you think the nucleus of a neuroncontains euchromatin predominantly? Name two functions of the Golgi complex.[ Demonstration slide ] PAS is a histochemical staining that stains glycogen or glycoprotein selectively in cells.Large amounts of particles representing glycogen masses are present in the hepatic cells( Figure l-5) . The nucleus which is palely stained is devoid of glycogen.[ Questions ] 1. What is basophilia? What is acidophilia? 2. Which histological staining is routinely used for study of cells and tissues? 3. Using the neuron as an example, describe the light microscopic structure of a cell. Epithelial tissue is avascular; it covers the body surface, lines the body cavities and con-stitutes glands. The tissue is composed of closely aggregated cells with very little extracellularmatrix. The epithelial cells show a polarity having free, lateral and basal surfaces. There arethree types of epithelial tissue including the covering epithelium, glandular epithelium andspecial epithelium. The principal functions of epithelium are protection, absorption,secretion, and sensory reception. [ Objectives ] 1. To identify and describe: A. simple squamous epithelium. B. simple cuboidal epithelium. C. simple columnar epithelium. D. pseudostratified ciliated columnar epithelium. E. stratified squamous ( keratinized and nonkeratinized) . 2. To understand the main features and functions of the transitional epithelium.[ Observation of tissue sections] Naked eye: The tissue section appears pyramidal in outline. The area close to the base ofthe pyramid is the cortex of the kidney; nearer to the apex of the pyramid is the medulla. Low power: Many renal corpusclesare distributed in the cortex. Identify therenal corpuscles and focus on one of them. High power:A renal corpuscle com-prises the glomerulus and the renal capsule( Bowman' s capsule) . Note that the parie-tal layer of the renal capsule is lined bysimple squamous epithelium. In the latter,the squamous cells are polygonal in shapeon a surface view but appear flattened andvery thin on a side view. They appear as acellular sheet under the light microscope( Figure 2-1) .Low power: Examine the medulla of the kidney. Many collecting tubules may be seen.
定价:55.0
ISBN:9787030392596
作者:吴春云,Ling Eng Ang
版次:1
出版时间:2014-01
内容提要:
“HISTOLOGY PRACTICAL HANDBOOK” is a joint effort by several eminent professors from the National University of Singapore and a few leading universities in China. The book contains 196 carefully selected photomicrographs illustrating the four primary basic tissues in histology and the major systems and organs in the body. Each photomicrograph is accompanied by clear and concise descriptive legends highlighting the salient histological features of various tissues and regions. The contents accurately reflect the relevant learning topics and are set at a high level of international standard. Where relevant, they are integrated with human anatomy, pathology, physiology and clinical medicine for the benefit of medical students for their life-long learning, critical thinking and revision of the subject.
媒体评论:
编辑推荐
暂无相关内容
目录:
Contents Chapter 1 Introduction to Histology Practical Classes and Use of a Light Microscope (1) Chapter 2 Epithelial Tissue (6) Chapter 3 Connective Tissue Proper (11) Chapter 4 Cartilage and Bone (15) Chapter 5 Blood (20) Chapter 6 Muscle Tissue (24) Chapter 7 Nervous Tissue (28) Chapter 8 Integument (37) Chapter 9 Cardiovascular System (40) Chapter 10 Immune System (46) Chapter 11 Eye (51) Chapter 12 Digestive Tract (56) Chapter 13 Digestive Glands (65) Chapter 14 Respiratory System (71) Chapter 15 Urinary System (75) Chapter 16 Endocrine System (79) Chapter 17 Male Reproductive System (84) Chapter 18 Female Reproductive System (89) Table of Slides (96)
在线试读:
Chapter l Introduction to Histology Practical Classes and Use of a Light Microscope Histology is the study of normal microscopic structure of the human or animal body through the light and electron microscopy. In this connection, the practical class is deemed tobe the best mode of study to complement as well as enhance the learning of the subject and tobetter understand and appreciate the functions of the human body at the cellular and tissuelevels. Through the microscope, students can on their own better observe and study the mor-phology of cells, tissues and organs in the laboratory. Indeed, the hands-on practical class isthe most efficient way for training of students in their ability for life-long and independentlearning, analytical and creative thinking. It is therefore essential for all students to be fullyequipped and be competent with the usage of this investigative tool or mode of study. [Objectives] 1. To use the light microscope correctly. 2. To describe the structure of cells accurately. 3. To know step-by-step the procedure for preparing the paraffin embedded tissuesections and haematoxylin and eosin ( H&E) staining routinely used for the practical class.[ Component parts of a light microscope and its usage] The optical microscope is widely used in different disciplines of science. It plays a vitalrole for exploration and investigation of tissue organization both in teaching and research. Asthe microscope is an expensive instrument that demands careful and precise manipulation, anyimproper usage or poor maintenance may cause damage to the instrument resulting in undesira-ble outcomes. All students are therefore expected to familiarize yourselves first with the differ-ent parts of the microscope and their properties before you intend to examine the microscopicslides independently. A standard optical microscope normally consists of two major parts: mechanical compo-nent and optical component. The mechanical component includes the stand and arm, oculartube, nosepiece, specimen stage, specimen holder, focusing device ( coarse focus knob andfine focus knob) etc. The optical component includes the eyepiece, the objective lens, con-clenser, illuminator etc ( Figure l-1) . (1) Setting up the microscope: The microscope is an optical instrument with great preci-sion and therefore it should be carefully protected and properly maintained. The placement ofthe microscope is of utmost important as it should be suitable and comfortable for your ownpersonal observation of slides. For safety reason, it must be kept from the edge of the table at a distance no less than 6 cm. (2) Viewing: When viewing a slide with the objective lens, you should always beginwith the low-power lens before switching it over to a higher-power lens to avoid damage to theslide or lenses. A. Use of a low-power objective lens Turn on the power. Adjust the light path by turning the objective lens to make sure thatthis maneuver passes through the multiple low-power objective lenses in an ascending orderfrom the lowest power lens. Meanwhile, you should hear a "ka" sound when the objectivelens is switched from one to another. Open the diaphragm, raise the condenser and with yourtwo eyes open, adjust the distance between the two oculars. Next, use the illuminative controlto allow the optimal lighting. Place a slide on the specimen stage and stabilize it using thespecimen holder. Ensure that the tissue section is on the upper side of the slide. Move thespecimen into the center of the light path with the thruster and focus on it. Turn the coarse fo-cusing knob to move the stage up to the highest level; then turn the knob slowly to lower thestage. When the image is in the view, turn the fine focusing knob to ensure that it is better fo-cused. B. Use of a high-power objective lens Before using the high-power objective lens, you must first find a sharp image under thelow-power objective lens. Once you have a selected sharp image under the low-power lens,move the target to the center of the field and focus it. Turn the high-power objective lens verycarefully so as not to damage the specimen. Examine the specimen through the ocular by ad-justing the fine focusing knob only. N. B. You should never use the coarse focusing knob under the high power objectivelens. (3) Replacing the glass slides: When you have completed viewing a slide, and wouldlike to move on to the next, you must first move the stage down under the low-power objectivelens. After this, remove the slide from the pinchcock in order to avoid damaging to the slideand the objectives. (4) At the end of the class session, do remember to remove the slide from the micro-scope , turn off the power, return your microscope to its appropriate place, and put on the dustcover. 3 . Additional notes or tips for use of a class microscope (1) The microscope and the slides must be carefully and properly kept and maintained;the cover slip on a slide placed on the microscope stage should always be face up; changing ofslides must be carried out under the low-power objective lens. When using the high-power ob-jective lens, do ensure a safe distance between the objective lens and the slide. (2) Under no circumstances the lenses are removed from the light microscope. Any loos-en or damaged parts should be reported to the teacher-in-charge immediately. ( 3 ) Keep the microscope clean, and any dirt found on it must be wiped off immediately.If the lenses are dirty, clean them gently with a lens paper. Do not use your hands or a hand-kerchief, or else they may damage the lenses. (4) Do remember that you are sharing your slide box with other students. After viewingthe slides, do make sure to return them to their proper slots. Be considerate. (5) Before each laboratory class, check the light microscope and the slides. If you no-tice any damage to the microscope or missing slides, you should report this to the staff-in-charge.[ Procedure for preparation of paraffin embedded tissue sections and H&E staining] The first step in examination of tissues and organs under a light microscope in the labora-tory class is preparation of histology slides. The most commonly used method for this purposeis preparation of tissue sections derived from formalin-fixed tissues which are paraffin-embed-ded. Tissue sections are first prepared from this and then stained with haematoxylin and eosin( H&E) to differentiate the different components of cells and tissues. The purpose of fixation is to prevent the fresh tissue from undergoing autolysis ordigestion by bacteria. Fixation preserves the integrity of tissue structure and molecular compo-sition. Some chemical or mixture of chemicals is used as fixatives. Formalin is widely used asa fixative of choice for the preparation of the histology sections. Tissues are usually immersedin solutions of fixatives immediately after they are removed from the body. Before the fixation,the specimen must be cut into the small pieces so as to allow the fixative to penetrate fully intothe tissue. Sometimes, the animals such as rats and from which the tissues are derived are perfused by intravascular perfusion. In this case, the fixative can reach the tissue rapidlythrough the blood vessels ( arteries). The purpose of embedding is for obtaining thin tissue sections so that the light can pass through the tissue for optical and optimal visualization under the microscope. The paraffin em-bedding is used routinely for light microscopy. Before embedding, tissue should bedehydr ated with ascending concentrations of alcohol. After this, tissue will be cleared in xy-lene and impregnated in melted paraffin in the oven which allows the paraffin to diffuse intothe tissue spaces. The tissue together with the impregnated paraffin is then solidified outside the oven at room temperature. The hardened blocks containing the tissue are now ready forsectioning on a microtome. Tissue sections are normally cut with a microtome at a thicknessranging from l t0 10 ym. The sections are floated on water surface and transferred to glassslides to be stained. To differentiate and better appreciate the different components of tissues and cells, it isnecessary to "color" them. Before the staining, paraffin must be dissolved or cleared with xy-lene. The combination of haematoxylin and eosin ( H&E) is the most commonly used staining method. Tissue components that pick up the basic dye are described to be basophilic, while those with an affinity for acid dyes are regarded to be acidophilic. N. B. Do note that some artifacts such as shrinkage, wrinkles, and precipitates of stainmay be present in the slides. These artifacts are linked to the methodology, equipment or rea-gents used during the preparation process. Students must be aware of the existence of artifactsand appreciate that not every slide in their slide-box collection is always perfect.[ Observation of tissue sections] Low power: Many nerve cells ( neurons) , nerve fibers and glial cells can be seen in the section ( Figure l-2) . High power: The dorsal root ganglion cells or sensory neurons are classified as pseudo-unipolar neurons. The cell body or soma of the neurons is generally round or elliptical. The outline of the neurons is well delineated but the cell membrane (plasma membrane) is not well defined under the microscope. Some bluish granules named Nissl bodies are randomly distributed in the cytoplasm. The nucleus which is often centrally located and bearinga conspicuous nucleolus is lightly stained.The satellite cells, a form of glial cells,surround the neuronal cell body or soma( Figure l-3 ). They provide nutrientsupport to the neurons. A section through the dorsal root gan-glion stained with silver nitrate. Thismethod facilitates the staining of the Golgicomplex of the neurons. The Golgi complexwhich is stained brown is located in the cy-Black arrow: Neuron; White arrow: Glia cells ( satellitetoplasm near the nucleus. Note the nucleus cells)is lightly stained ( Figure l-4). Questions: Why do you think the nucleus of a neuroncontains euchromatin predominantly? Name two functions of the Golgi complex.[ Demonstration slide ] PAS is a histochemical staining that stains glycogen or glycoprotein selectively in cells.Large amounts of particles representing glycogen masses are present in the hepatic cells( Figure l-5) . The nucleus which is palely stained is devoid of glycogen.[ Questions ] 1. What is basophilia? What is acidophilia? 2. Which histological staining is routinely used for study of cells and tissues? 3. Using the neuron as an example, describe the light microscopic structure of a cell. Epithelial tissue is avascular; it covers the body surface, lines the body cavities and con-stitutes glands. The tissue is composed of closely aggregated cells with very little extracellularmatrix. The epithelial cells show a polarity having free, lateral and basal surfaces. There arethree types of epithelial tissue including the covering epithelium, glandular epithelium andspecial epithelium. The principal functions of epithelium are protection, absorption,secretion, and sensory reception. [ Objectives ] 1. To identify and describe: A. simple squamous epithelium. B. simple cuboidal epithelium. C. simple columnar epithelium. D. pseudostratified ciliated columnar epithelium. E. stratified squamous ( keratinized and nonkeratinized) . 2. To understand the main features and functions of the transitional epithelium.[ Observation of tissue sections] Naked eye: The tissue section appears pyramidal in outline. The area close to the base ofthe pyramid is the cortex of the kidney; nearer to the apex of the pyramid is the medulla. Low power: Many renal corpusclesare distributed in the cortex. Identify therenal corpuscles and focus on one of them. High power:A renal corpuscle com-prises the glomerulus and the renal capsule( Bowman' s capsule) . Note that the parie-tal layer of the renal capsule is lined bysimple squamous epithelium. In the latter,the squamous cells are polygonal in shapeon a surface view but appear flattened andvery thin on a side view. They appear as acellular sheet under the light microscope( Figure 2-1) .Low power: Examine the medulla of the kidney. Many collecting tubules may be seen.
- 科学出版社旗舰店 (微信公众号认证)
- 科学出版社秉承多年来形成的“高层次、高水平、高质量”和“严肃、严密、严格”的优良传统与作风,始终坚持为科技创新服务、为传播与普及科学知识服务、为科学家和广大读者服务的宗旨。
- 扫描二维码,访问我们的微信店铺
- 随时随地的购物、客服咨询、查询订单和物流...

科学出版社旗舰店
关注公众号